As a skincare guru, I’ve become quite the expert at giving myself an excellent facial at home. Dare I say the results I get from doing a DIY version on my own is even better than from your average spa!
I’ve had the privilege of getting all kinds of treatments done at renowned spas and clinics, and I’ve figured out what makes some so effective and others not so much. So today I’m sharing the exact steps I take to do an effective at-home facial that gives me glowing skin every time.
Just follow my steps and you will save sooo much money AND improve your skin!
I’ll go into detail for each step further below.
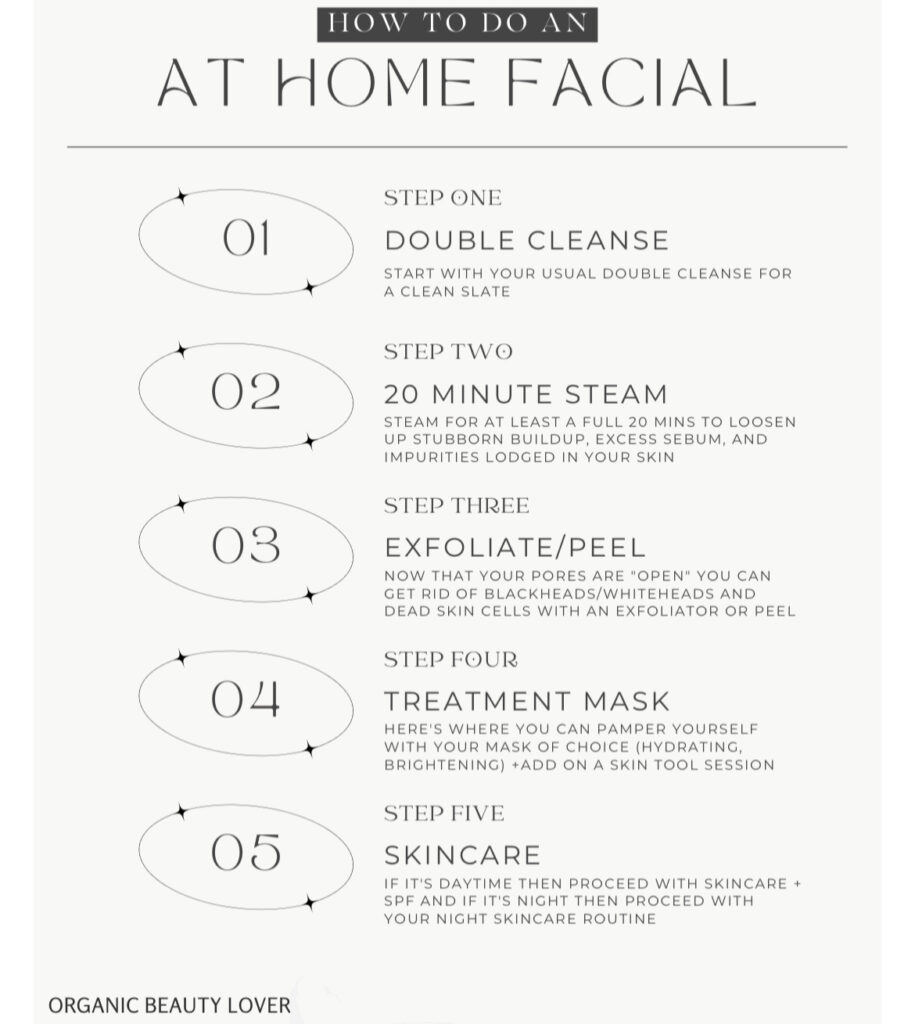
STEP 1: Double Cleanse
STEP 2: Facial Steam for at least 20-30 minutes
STEP 3: Exfoliate
STEP 4: Face mask
STEP 5: Apply Skincare
STEP 1: Double Cleanse
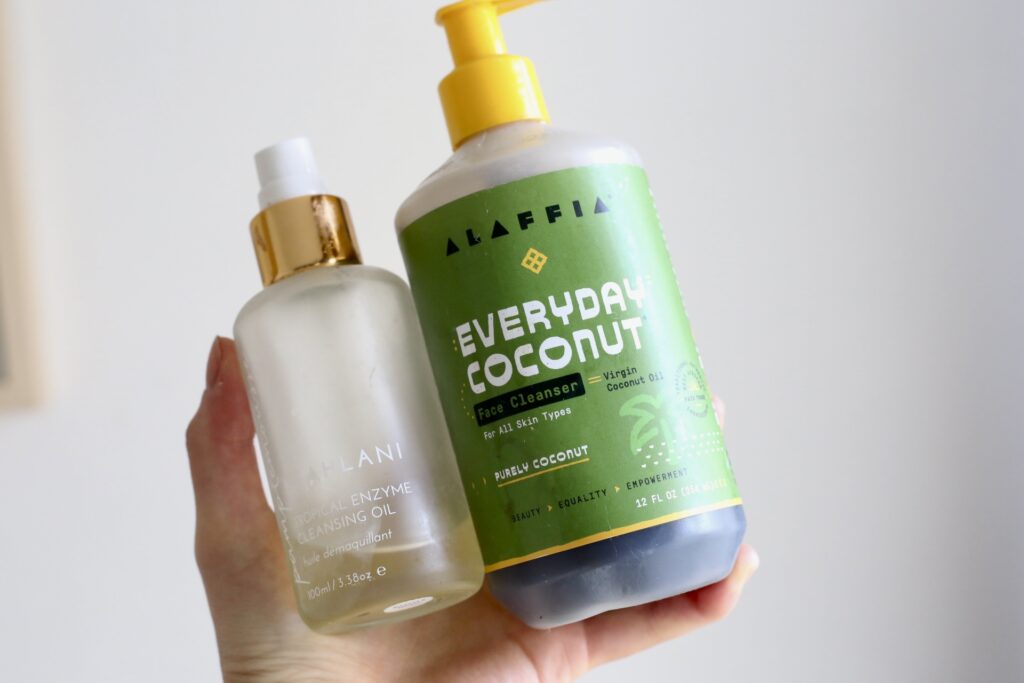
A good facial ALWAYS begins with a thorough and proper cleanse. The most thorough way to cleanse skin is by double cleansing!
First, use an oil cleanser to effectively remove makeup and sunscreen. The oil grips to all the gunk on your skin while keeping it moisturized. Make sure to massage the product into your skin for at least one minute.
Second, use a water-based or gel cleanser to remove any remaining residue. Spend one minute massaging your water-based cleanser into your skin before rinsing thoroughly. Make sure the water is lukewarm and NOT hot.
STEP 2: Facial Steam for 30 minutes
I firmly believe steaming the skin is what makes a facial a facial and will lead to the best results. It’s crucial to steam for at least 20 minutes, ideally half an hour, to properly loosen pores, the same way a good esthetician would in a professional facial.
This step is truly the difference maker between an average facial and a great facial.
Not doing so for long enough means the next steps won’t work as effectively, plus I have firsthand experience with this. Any facial I’ve gotten that didn’t involve ample steaming led to lackluster results.
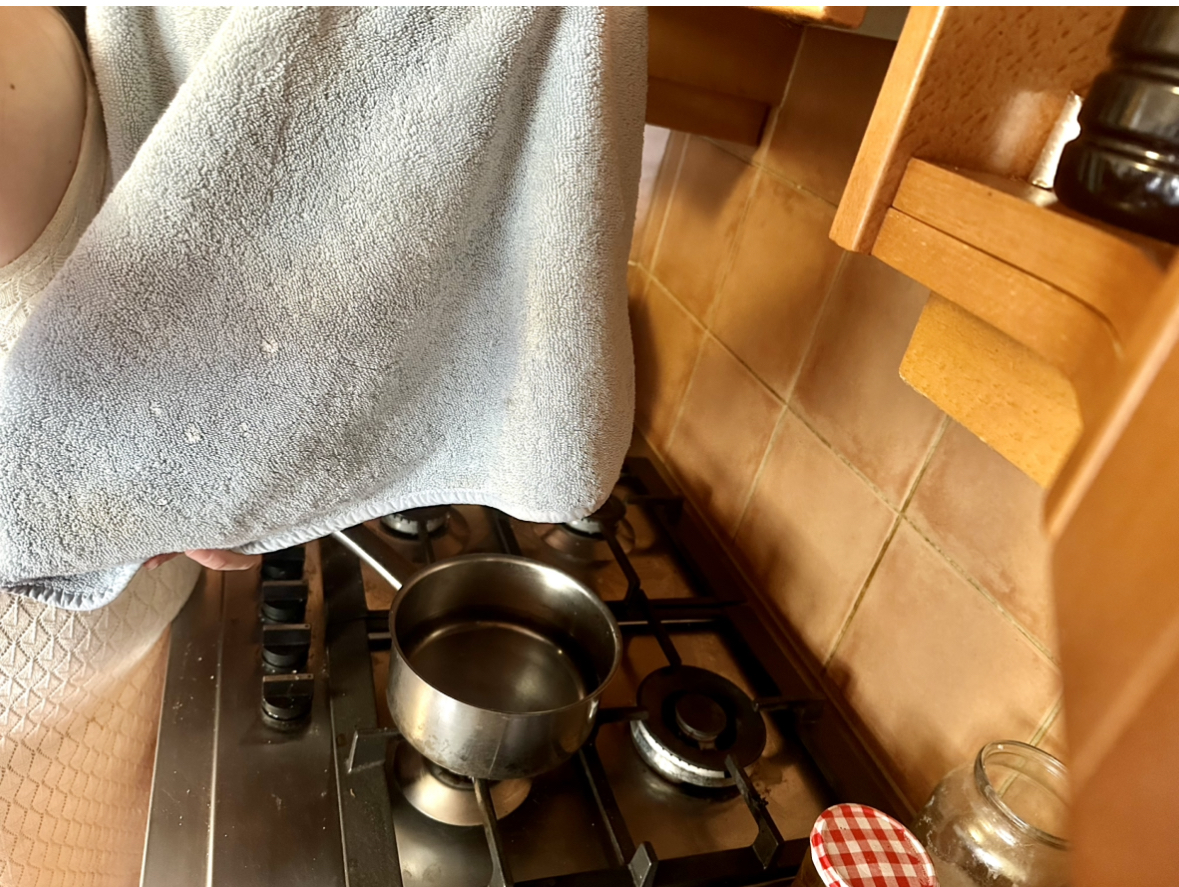
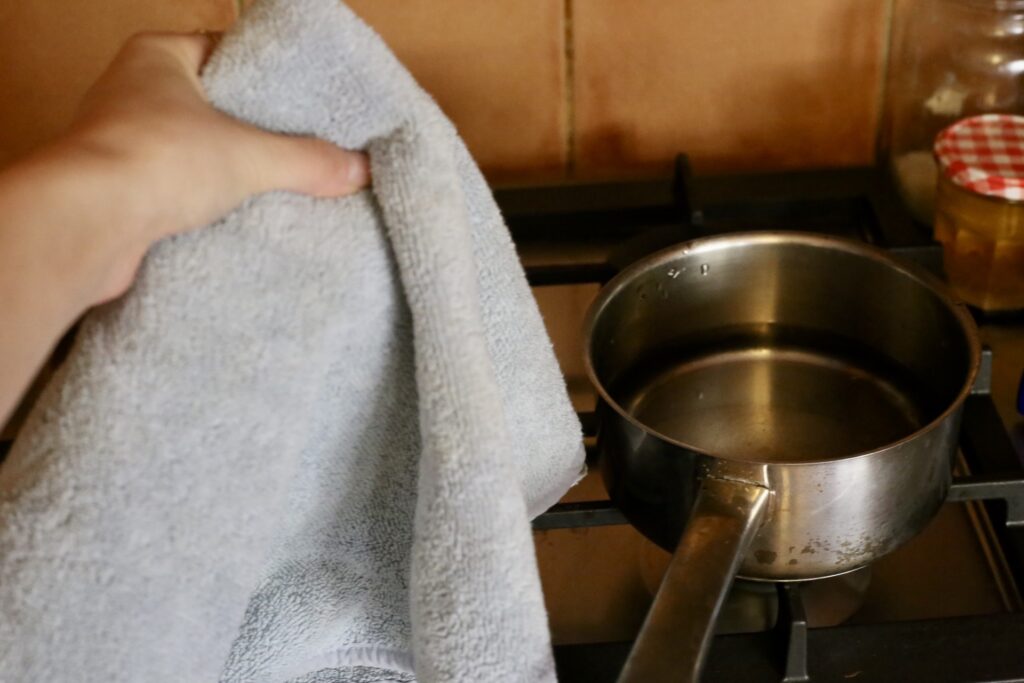
If you have a facial steamer product at home already, that’s perfect! You don’t necessarily need one though.
Simply boil some water in a pot, wrap a towel around your head and hover over the pot so your skin catches the steam. It’s not the most convenient method especially if you’re not patient enough to stand for half an hour, but it works!
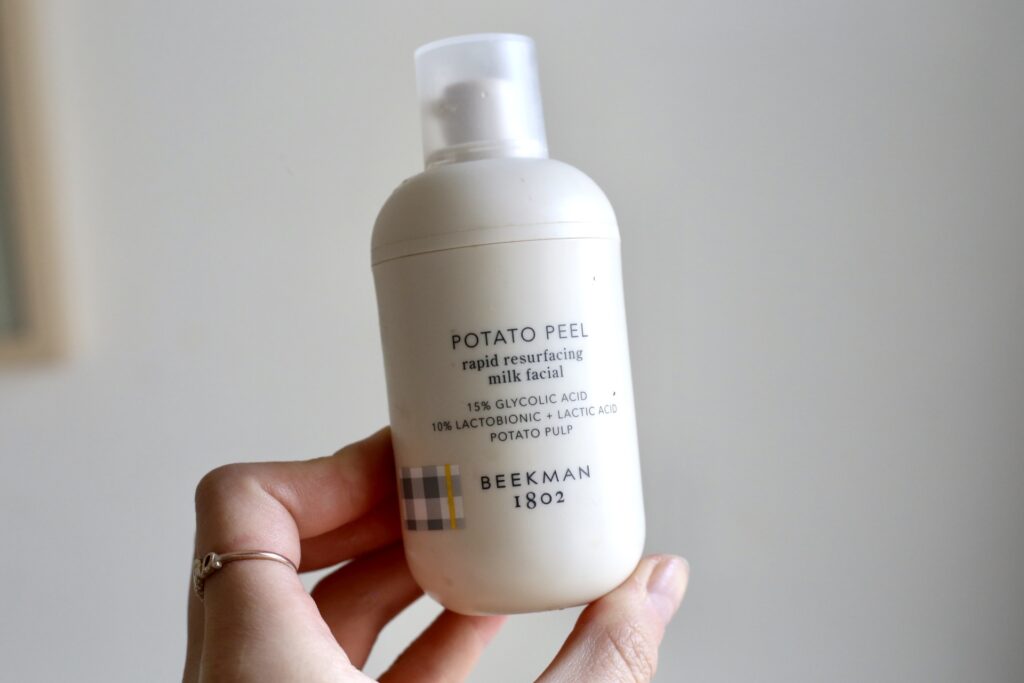
STEP 3: Exfoliate
Next a good at-home facial that will reveal super glow-y skin ways always involves exfoliation. Properly exfoliating the skin removes dead skin cells, buildup and sebaceous filaments.
The reason it’s so crucial is because it allows the active ingredients to really penetrate the skin and reach your skin cells where they can get to work.
For this step, I use either a physical or chemical exfoliator product or combination of both. Stay away from St Ives scrubs!
Make sure you follow the instructions for the specific exfoliator product you’re using. If it says to leave it on for 5 minutes, then leave it for 5 minutes and not a minute shorter or longer. If it says to leave it on for 20 minutes, then be sure to leave it on for the full 20 mins.
Check out my favorite organic exfoliating masks.
STEP 4: Face Mask
Next, I like to apply a face mask suited to what my skin currently needs. For instance, if my skin is feeling dry, I’ll opt for a hydrating face mask or sheet mask.
Since I’ve spent so much time prepping my skin than I normally would, I also like to use my most high-end masks during an at-home facial.
Trust me, there’s such a major difference I notice between using a face mask after a regular face cleanse and a more intense deep cleanse + steam session.
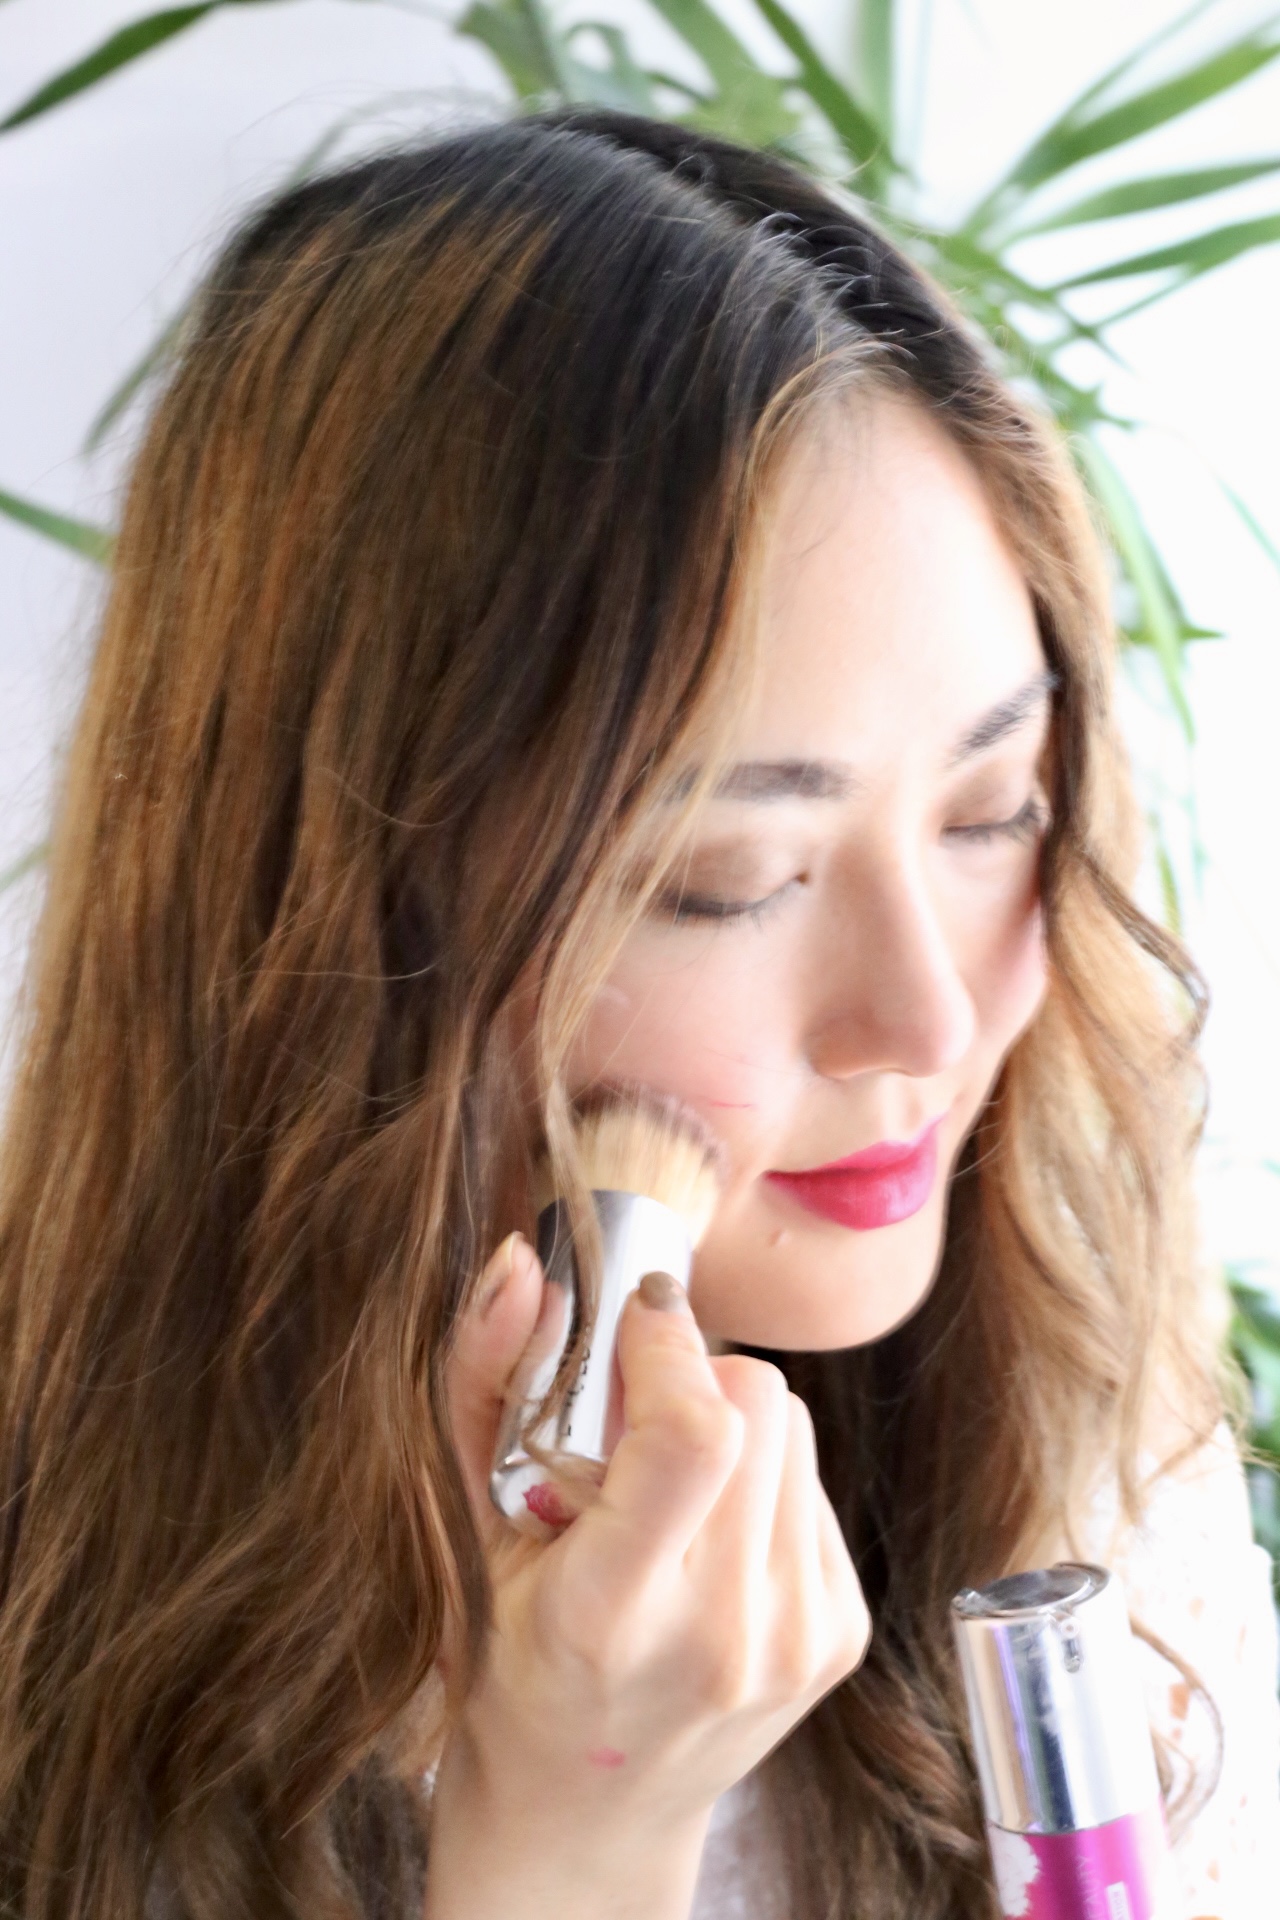
STEP 5: Apply skincare
Finally, the last step of my at-home facial includes applying skincare of course! The type of products I’ll use depends on whether it’s day or night.
If it’s still daytime, I’ll make sure to apply some kind of antioxidant or Vitamin C serum, moisturizer and clean sunscreen.
If it’s night and I’m about to go to bed, I’ll apply a serum, face cream, skip the sunscreen and use a natural face oil or face balm.
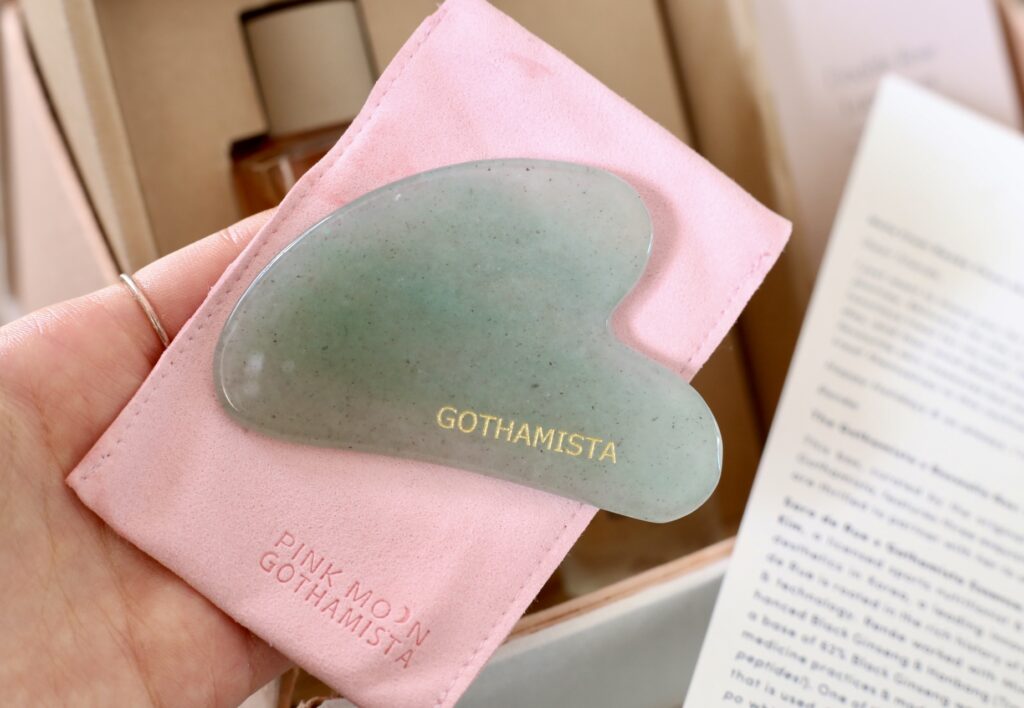
OPTIONAL STEPS: Red Light Therapy, Gua Sha, Microcurrent, Facial Massage
There are so many ways to level up a facial! A quick disclaimer, most of them involve using a skincare device and technologies like LED light therapy for collagen production, microcurrent for lifting and radiofrequency for skin tightening.
BUT you can also upgrade your facial without any tools.
For instance, you can use your hands to give yourself a facial massage using tried-and-true techniques for lymphatic drainage, depuffing and sculpting the face!
If you already own any skincare devices, incorporating them into an at-home facial is the perfect opportunity to maximize their use. My favorite professional facials have included LED red light therapy, so I highly recommend using an LED face mask for 30 minutes if you have one on hand.
This is one of the last steps in a facial that would happen after removing your face mask and before applying skincare.
If you want to upgrade your facial even more (just like with the add-ons on a spa menu), combine different facial treatments like red light therapy and a facial massage. It’s more of a time commitment, but you get to reap even more benefits.
There you have it – my perfect facial treatment at home in just a handful of simple steps! Please give it a try and let me know what improvements you see in your skin!
Andrea is a clean beauty expert from Los Angeles, California with 10 years of experience in natural skincare and organic living. She writes for Organic Beauty Lover using her expertise to guide readers in choosing the best clean products. Andrea graduated from the University of Southern California in 2012 and has worked at multiple skincare companies, big and small. Connect with her @organicbeautylover.
JOIN OUR NEWSLETTER! No spam ever.
Leave a Reply